Tuesday, June 5, 2012

Hanging the Ikea Cabinets

Once the cabinets were built and the rail was mounted, we hung the upper cabinets.  The walls are not plumb at all, so it will be very difficult to line up these cabinets and to make sure they are level and plumb.  We will have to use a lot of shims.

Upper kitchen cabinets are hung on the wall.

The ceiling beam will be over the refrigerator.

We placed the island cabinets where we will build the kitchen island.

Next we will install the bottom cabinets and see how they line up with the top ones.  The walls are not plumb, so its possible the bottom and top cabinets will not line up exactly. 

Friday, April 27, 2012

Building the Ikea Cabinets

The downstairs kitchen is huge, so we had lots of cabinets to build. We will also be building a kitchen island with a sink and dishwasher.

We had lots of practice putting together Ikea cabinets, so we are pros at building these now.


The rail is installed on the walls to hand the upper cabinets.


Thursday, April 19, 2012

Tile Floor in the Downstairs Kitchen

Now that the walls and ceiling are painted in the kitchen, we can work on the tile floor.

Kitchen floor all cleaned and prepped for tile.

This is what we finished in one day.

We finished the rest of the tile the next weekend.

Cut outs for the HVAC vents.

Then the next weekend we did the grout.

  
Grout dried and we added curtains for privacy.
The next step is to start installing the kitchen cabinets.  Once again we are using Ikea cabinets, so we need to build them first.

Thursday, April 12, 2012

Painting the Downstairs Kitchen

Once the upstairs kitchen was mostly done, we decided to start on the downstairs kitchen.  We wanted to prime and pain the downstairs kitchen prior to installing the tile.

Before the walls were primed.

Before the walls were primed.

After the walls were primed.

Primed walls and ceiling painted white.

The walls were painted with a light green paint.

Light green paint on the walls.  The window and door print will be painted later.

We will eventually add crown molding where the walls meet the ceiling.
Next we prepare to install the tile floor in the kitchen.

Thursday, April 5, 2012

Putting the upstairs kitchen together...

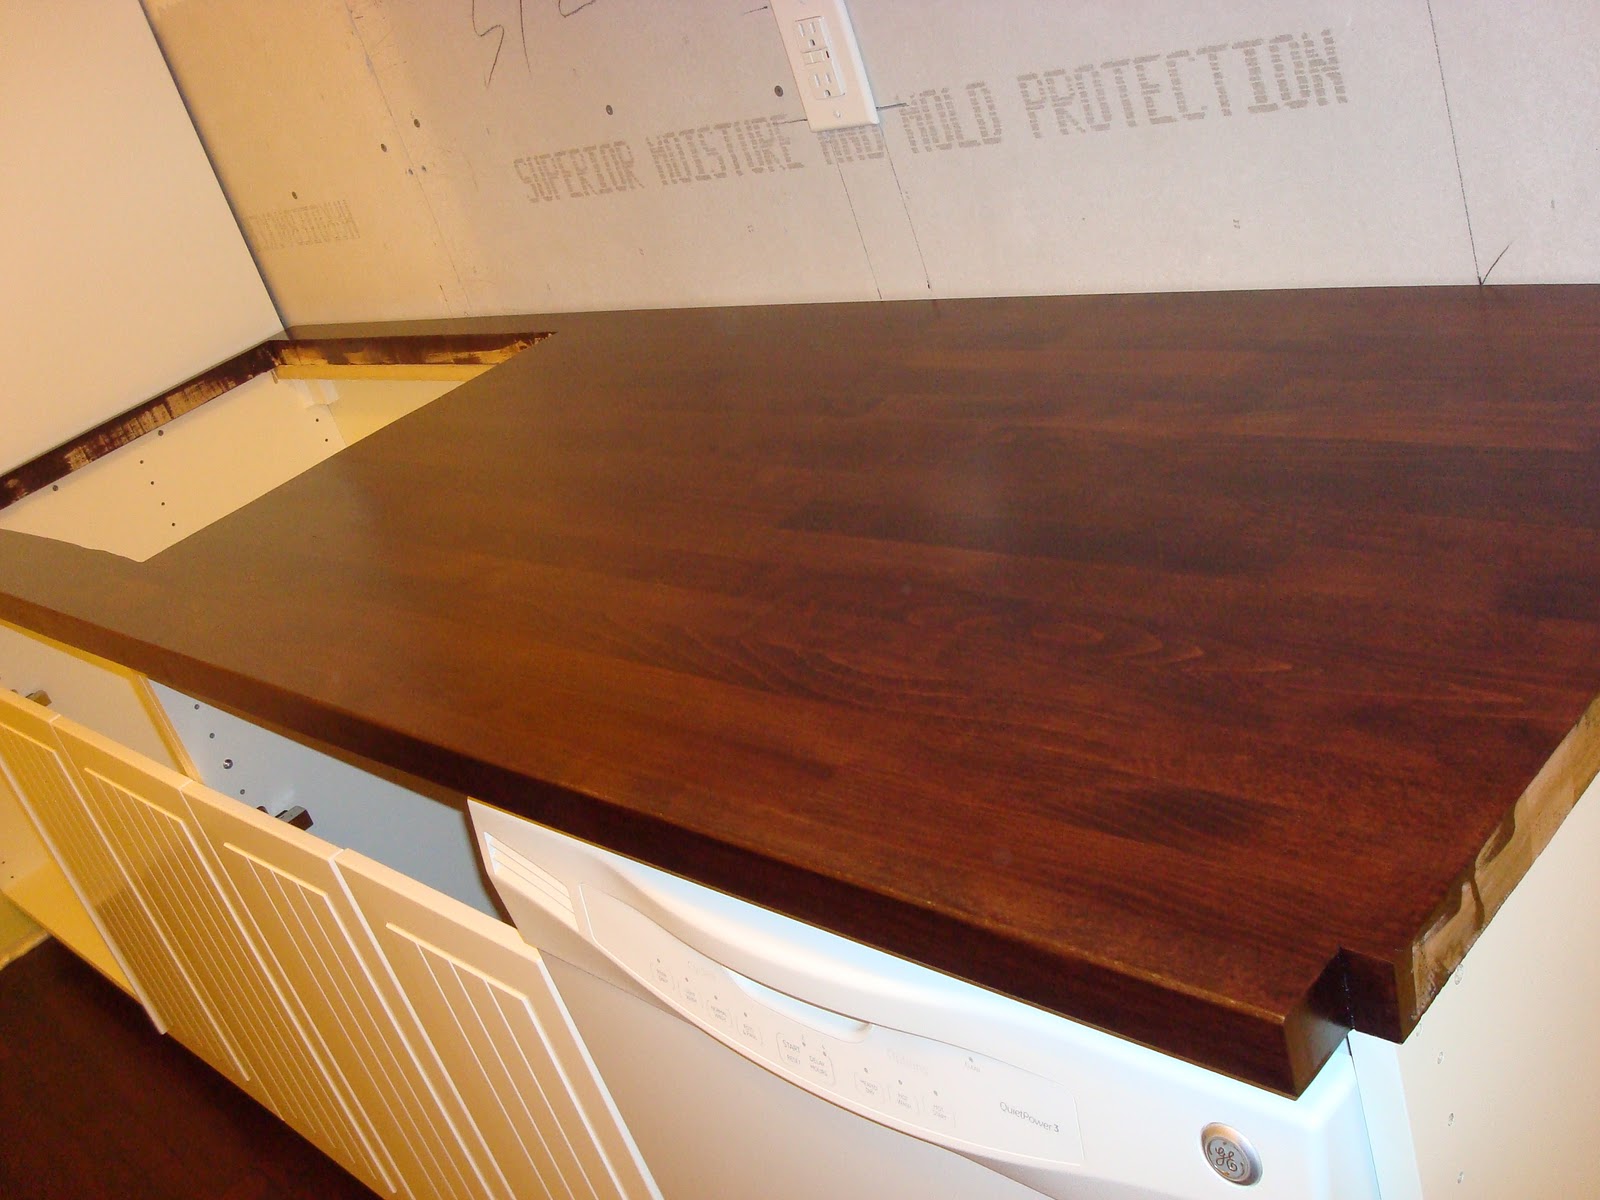
Once the butcher block counter tops were done; it was time to install them. We also installed most of the cabinet doors and appliances at that time.


We will need to install a backsplash for the kitchen wall above the counters.  We were thinking about installing ceramic subway tile or something similar.  But then we came across the idea of using tin ceiling tiles for the backsplash.  We ordered some samples, and these our favorite colors.

Next we will need to decide on the kitchen backsplash, also and install the handles and knobs on the kitchen cabinets.

Thursday, February 2, 2012

Finishing the Butcher Block Countertops

Prior to staining, we did some stain testing to see which one would work best and would give us the desired color.  Beech is a dense wood, and it does not always accept stain well.  The oil based stain did very poorly.  Even after two coats, it barely stained the wood and the coverage was very uneven.  Luckily, the water based stain worked very well.  It did not have the strong fumes that the oil based stain had, so it was a pleasure to work with.

We first wet down the countertops to raise the grain, and then we sanded the countertops with a 150 grit followed by a 220 grit sandpaper.  We used a power sander because this was a big job and would have taken forever if we did it by hand.

The countertops are sanded and ready for stain.

This is the water based stain that we used.

Stained countertops.

The trick with getting the water based stain even was to apply it very generously and to very quickly wipe off the stain before it dried on the wood.  So one person applied the stain, and the other person quickly wiped it off.

We chose a water based polyurethane from General Finishes (the maker of the water based stain).  We applied three coats of polyurethane on top of the stain. The polyurethane made the stain look slightly lighter and brought out the colors of wood grain in the wood.  It was a pleasure to work with the water based polyurethane; it has almost no smell at all and cleaned up easily with soap and water.

Water based polyurethane in semi-gloss that we used for our countertops.

Finished countertops.

Finished counter tops.
We are quite pleased with the results. 

Friday, January 27, 2012

Installing the Ikea Cabinets

Once the cabinets were put together, they were pretty easy to hang on the rails.


Once we hung the upper cabinets, we decided it would be fun to install our 1930's Art Deco light fixture that we purchased from Ebay.


Next we installed a ledger board along the wall on which the bottom cabinets will rest.


Ikea cabinets come with adjustable legs.  These were very useful because our floors were not level at all.  These legs allowed us to perfectly level our cabinets without having to use shims at all.  It was very easy to do.

We also purchased the beech butcher block countertops from Ikea.  Once the cabinets were installed, we cut the countertops to the size we needed and placed everything together to make sure it fits.  We even installed some of the cabinet doors on the upper cabinets.


Next, we need to finish the countertops.  The natural wood looks nice, but we think a darker color would look better with the white cabinets.

Thursday, January 19, 2012

Starting to Install the Ikea Kitchen

Ikea had a really good sale, so we decided to purchase our kitchen cabinets from Ikea.  We've always liked their kitchens, and we liked how affordable they are.  We've bought other furniture and things from there before, so we knew the quality would be good.

Everything from Ikea comes packed flat and must be assembled.  Its all designed to be very easy to assemble and comes with good instructions.  

 
Kitchen cabinet boxes assembled and waiting to be installed.
Ikea provides rails which are attached to the walls.  The top cabinets are hung from these rails.  This makes the installation of the upper cabinets super easy, and makes it very simple to hang the cabinets perfectly level.


We decided that its best to first paint the window frame before trying to hang cabinets next to it.  It took one coat of primer and two coats of paint to paint the window frame. 

Now we can start hanging the top cabinets.  The top cabinets get installed first, and then the bottom cabinets get installed.

Thursday, January 12, 2012

Priming and Painting the Kitchen

Next, we needed to prime and paint the kitchen.  Once we do that, we can start installing the kitchen cabinets.

We wanted to paint the walls a bright and cheerful color.  The kitchen cabinets are going to be white, so we wanted to have a bright colored kitchen to make it more interesting.


The color turned out to be even brighter than expected.  Hopefully, it will look good with the cabinets.

Thursday, December 15, 2011

Finishing the Upstairs Kitchen Floor

Now that the floor is repaired, we need to sand, stain, and finally coat it with polyurethane.  Since we had to use the electric block planer to remove the top layer of the floor to remove the glue from the wood floor, this created some deep and uneven gouges in the wood.  It will be impossible to sand it down to a totally smooth surface.  The floor will have a "hand scraped" or "distressed" look to it even after it is sanded.

Floor after it was sanded.

Floor after it was sanded.
We used a mahogany tinted wood stain on the floor.  It was dark enough to hide some of the discolorations in the floor, and we liked the reddish hue.  It really brought out the grain in the pine floor. 
Floor after it was stained.

We used an oil based polyurethane with a satin gloss which was made especially for floors.  We didn't want it to be too glossy.  After the first coat of polyurethane, the floor looked really bad and uneven.  After the second coat of polyurethane, the floor looked a lot better.  It is still not perfect because it has some grit in the finish.  So we may sand it, and add a third coat of polyurethane sometime in the future.  But for now, the floor is finished enough for priming and painting the kitchen and installing the kitchen cabinets.
Floor after two coats of polyurethane.


Floor after two coats of polyurethane.

Wednesday, December 7, 2011

Replacing the Termite Damaged Wood on the Kitchen Floor

A large portion of the downstairs hardwood floor was lost due to termite damage.  We harvested all that we could from that floor to use as replacements for repairs on other damaged portions of the hardwood floors.  The wood floors in the house are made of Longleaf Pine which is not easy to find these days. 

The upstairs kitchen had termite damage where the refrigerator leaked.  The water attracted the termites to the area.

Damaged floor boards removed, and the subfloor was built up in the spot where the termites ate the subfloor as well.

There was also termite damage to the bottom of the stud.

The bottom of the stud was replaced with an new piece of wood.  The replacement floor boards were cut to the correct length and fitted.

The tongue and groove floor.

Nailing the wood floor to the subfloor.


The floor is repaired.