Friday, January 27, 2012

Installing the Ikea Cabinets

Once the cabinets were put together, they were pretty easy to hang on the rails.


Once we hung the upper cabinets, we decided it would be fun to install our 1930's Art Deco light fixture that we purchased from Ebay.


Next we installed a ledger board along the wall on which the bottom cabinets will rest.


Ikea cabinets come with adjustable legs.  These were very useful because our floors were not level at all.  These legs allowed us to perfectly level our cabinets without having to use shims at all.  It was very easy to do.

We also purchased the beech butcher block countertops from Ikea.  Once the cabinets were installed, we cut the countertops to the size we needed and placed everything together to make sure it fits.  We even installed some of the cabinet doors on the upper cabinets.


Next, we need to finish the countertops.  The natural wood looks nice, but we think a darker color would look better with the white cabinets.

Thursday, January 19, 2012

Starting to Install the Ikea Kitchen

Ikea had a really good sale, so we decided to purchase our kitchen cabinets from Ikea.  We've always liked their kitchens, and we liked how affordable they are.  We've bought other furniture and things from there before, so we knew the quality would be good.

Everything from Ikea comes packed flat and must be assembled.  Its all designed to be very easy to assemble and comes with good instructions.  

 
Kitchen cabinet boxes assembled and waiting to be installed.
Ikea provides rails which are attached to the walls.  The top cabinets are hung from these rails.  This makes the installation of the upper cabinets super easy, and makes it very simple to hang the cabinets perfectly level.


We decided that its best to first paint the window frame before trying to hang cabinets next to it.  It took one coat of primer and two coats of paint to paint the window frame. 

Now we can start hanging the top cabinets.  The top cabinets get installed first, and then the bottom cabinets get installed.

Thursday, January 12, 2012

Priming and Painting the Kitchen

Next, we needed to prime and paint the kitchen.  Once we do that, we can start installing the kitchen cabinets.

We wanted to paint the walls a bright and cheerful color.  The kitchen cabinets are going to be white, so we wanted to have a bright colored kitchen to make it more interesting.


The color turned out to be even brighter than expected.  Hopefully, it will look good with the cabinets.

Thursday, December 15, 2011

Finishing the Upstairs Kitchen Floor

Now that the floor is repaired, we need to sand, stain, and finally coat it with polyurethane.  Since we had to use the electric block planer to remove the top layer of the floor to remove the glue from the wood floor, this created some deep and uneven gouges in the wood.  It will be impossible to sand it down to a totally smooth surface.  The floor will have a "hand scraped" or "distressed" look to it even after it is sanded.

Floor after it was sanded.

Floor after it was sanded.
We used a mahogany tinted wood stain on the floor.  It was dark enough to hide some of the discolorations in the floor, and we liked the reddish hue.  It really brought out the grain in the pine floor. 
Floor after it was stained.

We used an oil based polyurethane with a satin gloss which was made especially for floors.  We didn't want it to be too glossy.  After the first coat of polyurethane, the floor looked really bad and uneven.  After the second coat of polyurethane, the floor looked a lot better.  It is still not perfect because it has some grit in the finish.  So we may sand it, and add a third coat of polyurethane sometime in the future.  But for now, the floor is finished enough for priming and painting the kitchen and installing the kitchen cabinets.
Floor after two coats of polyurethane.


Floor after two coats of polyurethane.

Wednesday, December 7, 2011

Replacing the Termite Damaged Wood on the Kitchen Floor

A large portion of the downstairs hardwood floor was lost due to termite damage.  We harvested all that we could from that floor to use as replacements for repairs on other damaged portions of the hardwood floors.  The wood floors in the house are made of Longleaf Pine which is not easy to find these days. 

The upstairs kitchen had termite damage where the refrigerator leaked.  The water attracted the termites to the area.

Damaged floor boards removed, and the subfloor was built up in the spot where the termites ate the subfloor as well.

There was also termite damage to the bottom of the stud.

The bottom of the stud was replaced with an new piece of wood.  The replacement floor boards were cut to the correct length and fitted.

The tongue and groove floor.

Nailing the wood floor to the subfloor.


The floor is repaired.

Wednesday, November 30, 2011

Upstairs Kitchen Floor

The upstairs kitchen floor had vinyl tiles glued to the original hardwood floor.  We hoped to remove the vinyl tiles and restore the hardwood floor.

Wood floor with the vinyl tiles.

The vinyl tiles turned out to be very easy to remove.  The whole tiles popped off easily with a scraper.  So now were faced with the challenging task of removing the glue that was used to glue them to the wood floor.

Wood floor with the glue on it.

We first tried various chemicals such as mineral spirits and paint removers, but these didn't do anything to remove the glue.  Next we tried the Silent Paint Remover (an infrared heat gun) to soften and remove the glue, but once again this was very ineffective.  Next we tried a wallpaper steamer to try to soften the glue, and this seemed to be the most promising. It did soften the glue and allowed us to remove the glue where the wood floor was coated with polyurethane.  However, 95% of the floor was not coated with polyurethane, so this was not going to work.  We realized that the glue was not on top of the wood; it actually seeped into the wood floor.

We almost decided to remove the floor and install tile over it.  However, we came up with one last idea to try.  We used an electric block planer to take off the top layer of the wood floor.  This was very effective, and we were able to save the floor.

Wood floor after the block planer was used to remove the top layer of the wood.

In the corner of the kitchen there was a section of wood floor that needed to be removed and replaced.  That was under the refrigerator which leaked and attracted termites to the area.  So the wood floor in that area needed to be replaced.  Here you can compare the bare wood on which the block planer was used the wood with the glue on it side by side.

 
Termite damaged wood floor that needs replacing.


Tuesday, November 22, 2011

Jack-n-Jill Bathroom Fixtures Installed

The sink and toilet are installed in the Jack-n-Jill bath!  We installed them before we repaired and refinished the wood floor, before the baseboard molding was installed, and before the drywall was primed and painted.  We realize that we will need to uninstall the sink to repair and refinish the floor and to add the wood molding around the floor.  We needed a working bathroom as soon as possible, so we did things out of order.


We were very lucky to find a sink that fit so perfectly in the small space that was available.  Its almost like it was designed for that space.

Thursday, October 20, 2011

Installing the Shower Glass Enclosure

The shower base we bought came with a glass enclosure with a sliding shower glass door.  We purchased the DreamLine Sparkle glass enclosure for the DreamLine shower base.  We purchased these items online, so we never saw them in real life prior to purchasing them.  It seemed a little risky to buy such a large purchase online; however, we were pleased with the quality.

We were concerned that we may have some problems installing the glass enclosure because our walls are not plumb.  The glass does not bend and is perfectly square and straight, but our walls are definitely not. 

The shower glass enclosure was very well designed.  The metal frame which held the glass in place was adjustable and allowed for the walls to be up to 1 inch out of plumb.  The glass enclosure was fairly easy to install and worked very well.

We then caulked inside of the shower and installed the shower head and handle. 

Overall, we are very pleased with the results.

Thursday, October 13, 2011

Should we install another ceiling beam in the kitchen?

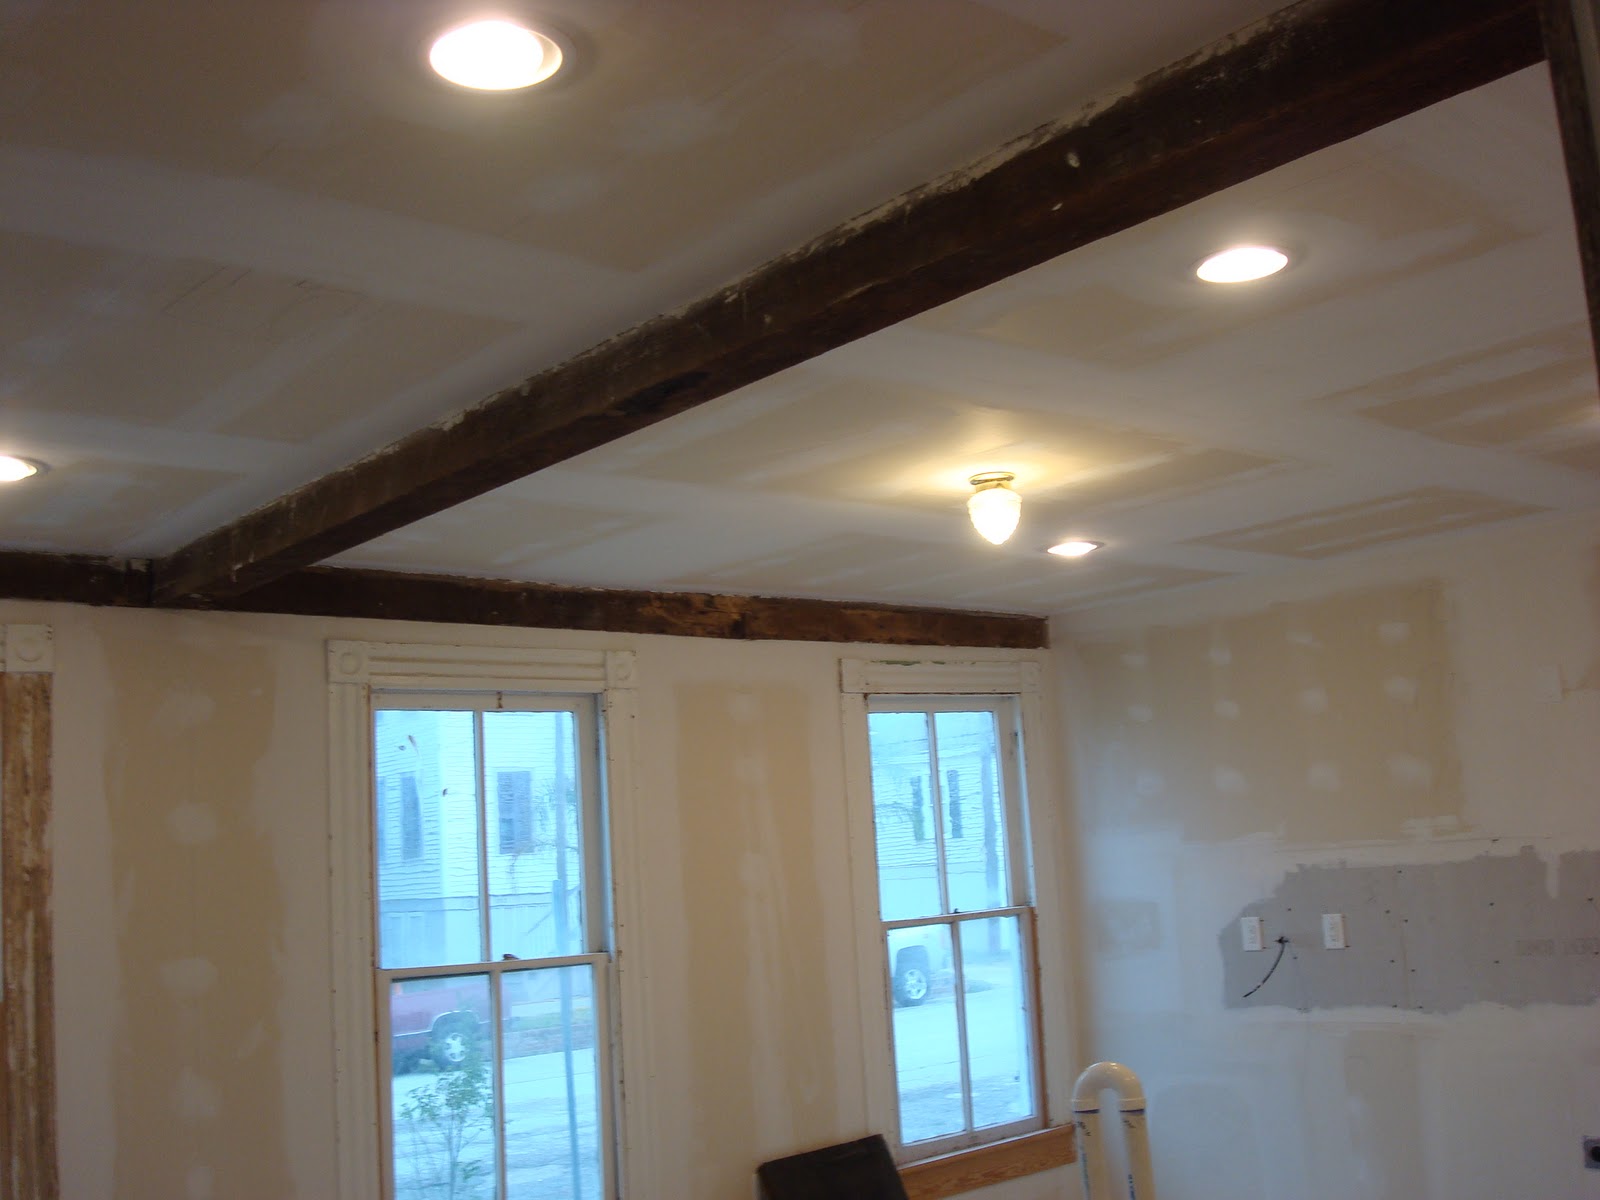
The house is composed of two houses joined together.  In the kitchen, there is one ceiling beam that was used to join the two houses together.  There are three windows in the kitchen, and the beam is in between two of them.  The beam is a rustic solid wood beam, and we are interested in keeping it exposed. 

However, we are wondering if we should add a second fake beam between the other two windows to make it look symmetric.  If we don't add the second beam, we can install the kitchen cabinets up to the ceiling. 

Does the kitchen look fine with just one beam off center?  Or should we add a second fake ceiling beam between the other two windows?

Ceiling wood beam in between the two windows - off center in the room.

The kitchen cabinets would go here. The gray cement board is for the tile back splash above the counter top.

Kitchen wall cabinets could go to the ceiling if we don't add the second fake beam.


Friday, October 7, 2011

Grout Failure and Installing New Grout

Once the grout dried, we noticed that it seemed very chalky. It had been a whole week. so we knew that was plenty of time to allow the grout to dry.  But it wasn't just chalky on top, it was chalky all through it.  We could take our finger nail and actually scratch the grout; that did not seem correct.  The grout should be hard and not soft and chalky when it dries.  There was no way this grout would not crack and fail in the near future; we knew we had to redo it.

The unfortunate part was that we had to remove all of the grout before we could replace it.  This was quite a job.  We used manual tile saws, small nails, and razor blades to pick the grout out in between the tiles.  Our grout joints were small, so we could not use power tools.  We had to be very careful not to damage the tile, as we picked out the grout.


Removing the grout in between the glass tiles was a slow and very tedious job.

It took two entire weekends to completely remove the old grout.  It was such an unpleasant and tedious job that we wanted to make sure that we don't have to do this ever again. So we researched online to find out why this may have happened.  Apparently, its not that uncommon.  The most common reason for this type of grout failure is that the grout was too old.  We learned that grout expires in about one year after it is manufactured, and it turned out our grout was about one year old.  We also wondered if the additive could have caused the grout to fail.

We then did lots of research to find the best type of grout and to reduce our chances of grout failure.  We simply did not have the energy or will to remove the grout again.  We learned of epoxy grout which was more expensive than unsanded grout, but never needed sealing and did not stain.  We decided to use epoxy grout this time.  Epoxy grout is sanded grout, but the particles are much smaller, so it can be used with smaller grout lines.

The epoxy grout worked really well.  It was runnier and a little harder to work with due to its runny consistency.  However, once we got used to it, it was easy enough to use.  It required special scrubbing pads and sponges to scrub the grout off the tiles once the grout had a chance to dry.  This was a little more difficult than using unsanded grout, but it was not too bad.

The epoxy grout dried much faster than the unsanded grout.  By the next day, it dried and felt very hard and solid.  It was not possible to scratch it, and it was not chalky at all.  Finally, success with the grout.  What a relief!

New epoxy grout installed.  It even brought out the color in the natural stone tiles.

Thursday, September 29, 2011

Major AC Repairs

Since we fired the original AC company, we had to find another that would do the repairs to our HVAC system to make it usable.  We finally found another company that agreed to repair and redo our HVAC duct work. 

Before the work started, we called to the city to get the status of our HVAC permit.  The original AC company told us that everything was completed and that they passed the city's inspection.  However, when we called, we found out that the original AC company lied to us and there was no city inspection performed on our AC system. 

So the new AC company agreed to perform the repair work and then do the city inspection with on our HVAC system.  They changed the sizes of some of the ducts to increase air flow; they added a vent to the upstairs hallway which had no vent before.  They replaced all of the torn ducts and made sure that the ducts were not crushed, so that we would get more air flow.  They also checked the charge of our AC units and found they were improperly charged; they corrected that as well as too many other things to list.  It took the new AC company almost a week to complete all of these repairs.

All new ducts getting installed under the house.

New ducts installed in the attic.
 
After all the work was completed, our system passed the leak test and passed the city inspection.  Finally, our new HVAC system is up to code.  We can finally use our air conditioning now that the summer is over and the weather is cooling off. 

Tuesday, September 20, 2011

Grout in the Shower

Once the tile was finished and the thin set mortar dried, it was time to do the grout.  The tiles adhered very well to the wall, so that was a relief.  We opted to use non-sanded grout with a special additive which made the grout stain resistant and not need sealing. The additive was added to the grout instead of water.  The guy at the tile store recommended the tile additive to us, and it seemed like a good idea for use that for a shower where stains and mildew would be an issue.  We had all kinds of shower grout problems in the past where the grout cracked and got water behind it, so we wanted as much of a maintenance free shower as possible.

We grouted the entire shower, and it looked really nice.  We now need to wait until the grout dries completely to see how it came out and to do the caulk at the corner and bottom.

Tile before the grout.

Grout all done.

Shower bottom all grouted.

Sunday, September 11, 2011

Laying the Shower Tile in the Jack-n-Jill Bath

The shower walls were not plumb, so laying the tile was going to be more difficult.  We wanted to make sure that we lay the tile in such a way that it disguises the fact that the walls are not plumb.  We measured the walls and planned out our tile to make sure that we ended up with whole or almost whole tiles in the corner.

We decided to use whole tiles at the bottom of the shower base because the shower base was almost level.  The slightly uneven gap between the tile and the shower base would be filled in with caulk at the end.

Since this was a small shower and we didn't have a good place for recessed shelves for the soap and shampoo, we decided to install corner shelves.  Recessed shelves were not possible, since one wall contained the plumbing and the other wall contained the pocket door.  It seemed very challenging to install the corner porcelain corner shelves because they were so heavy; it seemed hard to believe that the mortar alone could hold them up.  But it did, and when it dried they were very stable.


Friday, September 2, 2011

Tub Refinishing

There was an antique Kohler tub in the house in the upstairs bathroom.  It was in poor condition, scratched, peeling paint coming off it, and rusty in places, but we really liked how it looked and that it was an antique.  So we decided to keep it in the same bathroom and just have it refinished.

Back of tub.

Tub before it was refinished.

Rusty drain before refinishing.


Refinished tub.

Refinished tub edge.